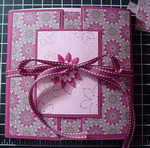
Shared by Jan Farring
Flip Flop Album
Supplies
- 4 sheets 12 x 12″ plain cardstock
- 6 sheets 12 x 12″ coordinating designer paper
- Paper cutter with scoring blade
- Adhesive
- Sticky Strip
- Embellishments
I used:
- Textured card stock in Pretty in Pink and Purely Pomegranate
- Berry Bliss Designer Paper Pack
- Boho Blossoms Punch
- Flower Fusion (felt flower pack)
The assembly instructions are divided into the following categories:
- Cardstock
- Designer Prints
- Cover
- Ribbon
- Embellishments
Cardstock:
1. Cut 3 sheets of cardstock in half 6 x 12″. Set one 6 x 12″ piece aside to use for cover.
2. Score and Fold each of the 5 remaining 6 x 12″ sheets 3″ from each outside edge as shown in diagram below.
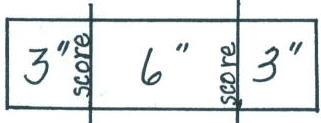
3. Adhere these five pieces together by putting adhesive on the 3″ areas as in diagram below.

Designer Prints:
1. Sections 1, 3, and 5 will have “doors” that close like the diagram below.

2. Cut five pieces of designer prints 5 3/4 x 5 3/4″. Lay out these 5 sheets on the 6″ cardstock squares; this will help you design the rest of the album. Adhere.
3. Cut 6 pieces of designer paper 5 3/4 x 2 3/4” for the “doors” and adhere these keeping the pattern matching.
4. Cut 6 additional designer pieces 5 3/4″ x 2 3/4″ for the insides of the doors. Adhere in place.
5. Next cut 4 pieces of designer prints 5 3/4 x 5 3/4″ for the remaining 6″ squares (when you fold up the album). Adhere.
Cover:
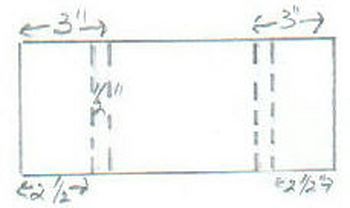
1. Score remaining piece of cardstock 3″ from each end and again at the 2 1/2″ mark. This will allow for the thickness of the book. See diagram below
Ribbon:
1. Open the cover and using a craft knife, make a slit in the middle of the 3″ scored line wider than your ribbon as shown below:
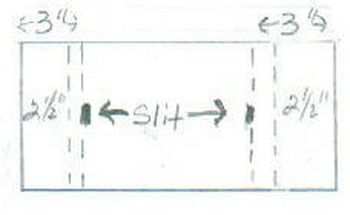
2. Adhere ribbon to inside of the cover and thread through the slits to the front.
3. To finish, adhere the book into the cover, putting adhesive only on the square of the center back. Sticky Strip works great!
4. Cut 4 pieces of designer print 5 3/4″ x 2 1/4″ to embellish the front cover and the insides of the cover.
Embellishments:
1. Front Cover: Cut cardstock 4 x 3″. Cut designer paper 3 3/4 x 2 3/4″. Layer, Close cover. Center on cover, applying adhesive to the left side only. Embellish.
2. This is what the front of your album will look like when done.
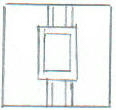
3. Decorate inside doors same as the front.
4. You will end up with 9 windows to place your pictures. When it’s laid out flat, there will be three sections with “doors” and two sections with pictures showing.
You start folding from the right and then fold in the left. Then right and left again!
Finished Album
Original directions by Ellen Smallwood
Redesigned by Jan Farring 5/2008

