
This technique is a really easy way to add a little background color behind another stamped image. You can stamp other images in the same color to add some more depth to the background if you want, or you can leave it just as-is. Customers enjoy this technique because it is one of those “unexpected uses” of a product that we offer. People love it when you can show them multiple uses for our great stuff! I hope that you’ll try out the technique and share your projects with us in the SUDSOL Gallery.
Created by Arden Dougan
Stamp Sets: World of Dreams, Sheltering Tree
Ink Pads: Elegant Eggplant, Delightful Dijon
Colors: Elegant Eggplant, Crumb Cake, Whisper White, Markers: Tip Top Taupe, Elegant Eggplant, Crushed Curry
Technique: Acrylic Block painting
Accessories: Linen Thread, Stampin Spritzer
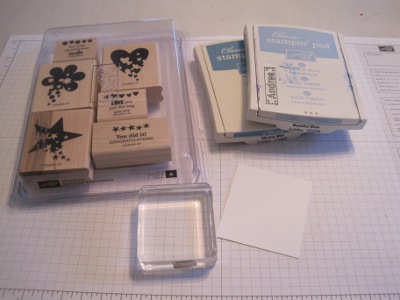
You will need the following supplies for this technique:
|
 |
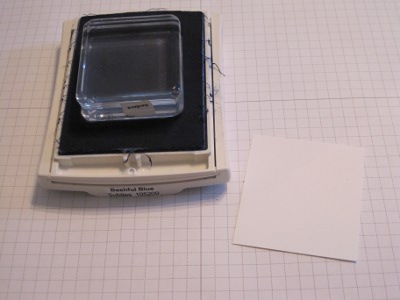
| Ink up one side of your acrylic block with the light ink like it was a standard stamp.
If you want, you can highlight the edges of the block with a slightly darker ink. |
 |
| “Stamp” your block onto your neutral cardstock. | 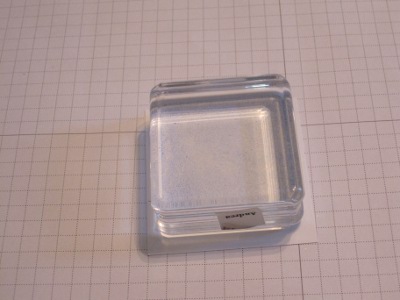 |
| This is what your block “stamped” image will look like. You will likely have lighter and darker areas which is part of the effect that you are creating. | 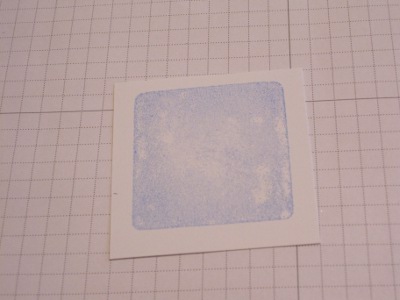 |
| Now you can stamp another image over the top in a darker ink. | 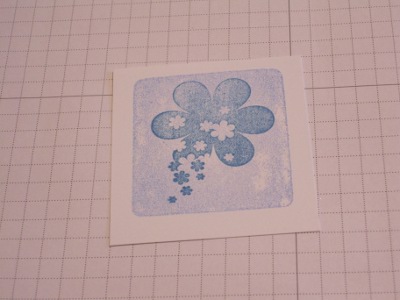 |
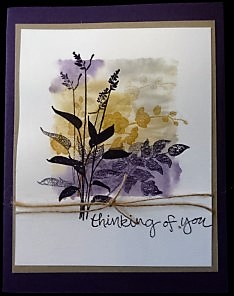
| This is my final project that I created with my Acrylic Block stamped panel. | 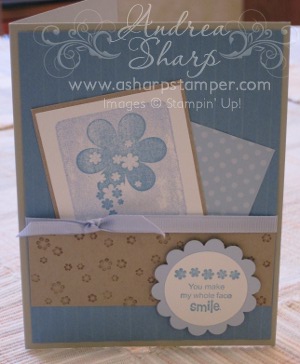 |
Another sample & tutorial from Lois Folla (the tutorial can be downloaded in the Attachments section below)

Andrea Sharp
Techniques Coordinator
[email protected]
What a beautiful sample, thank you.